10 Good Core Exercises That Aren’t Crunches or Planks
Stop doing endless crunches and planks. Your core is a 3D system that needs to be trained in 3D. Here are 10 better exercises to build functional strength and protect your spine.
This post may contain affiliate links. If you make a purchase through these links, we may earn a commission at no additional cost to you.
We’ve all been there. Lying on a gym mat, half-heartedly pumping out another set of 20 crunches, wondering why our lower back hurts and the promised six-pack still feels a million miles away. Or maybe you’re stuck in a plank, shaking, watching the seconds on your phone tick by, convinced this is the only path to a “strong core.”
Here’s the hard truth: We’ve been sold a lie.
It’s not that crunches and planks are “bad,” but they are just two simple movements in a world that demands a 3D, functional core. Chasing a six-pack with crunches is like trying to build a high-performance engine by only polishing the hood.
The problem is that we’ve confused our “abs” (the rectus abdominis, or the “six-pack” muscles you see) with our “core,” which is a complex, 3D system.
Think of your core not as a sheet of armor, but as a pressurized canister.
- The diaphragm is the lid on top.
- The pelvic floor is the base on the bottom.
- The transverse abdominis (TVA) (your deep, internal “corset” muscle) and obliques (your “side” abs) wrap around the sides.
- The multifidus and erector spinae (your deep back muscles) provide the support from behind.
The real job of this canister isn’t just to bend and flex (like a crunch); it’s to stabilize your spine. Its primary role is to resist unwanted movement, allowing you to transfer power from your legs to your arms safely and efficiently. Whether you’re lifting a heavy box, swinging a golf club, or just getting out of a chair, your core is bracing to protect you.
This guide will show you 10 exercises that train your core for that job.
Key Takeaways
- Your Core is a 3D System: It includes your abs, obliques, deep back muscles, diaphragm, and pelvic floor.
- Stability Over Flexion: The core’s main job is to resist unwanted movement (twisting, bending, arching) to protect your spine.
- Train Functions, Not Just Muscles: True core strength comes from training its four primary functions: anti-extension, anti-rotation, anti-lateral flexion, and dynamic stabilization.
- Crunches Are Not the Enemy (But They’re Not the Answer): Crunches are a single-plane “spinal flexion” exercise. An over-reliance on them can neglect the other, more critical functions of your core and may even contribute to poor posture and back pain for some.
Why Your Core Training Isn’t Working (And What “Core” Really Means)
Let’s quickly break down why your current routine might be failing you.

The Problem With Crunches & Planks: A 2D Solution for a 3D Problem
A crunch is an exercise in spinal flexion (bending your spine forward). This is one, and only one, of the spine’s many movements. In real life, you almost never need to repeatedly flex your spine under load. In fact, you usually want to avoid it (think: “lift with your legs, not your back!”). Dr. Stuart McGill, a world-leading expert in spine biomechanics, has famously shown that repeated spinal flexion is a primary mechanism for disc injuries. Again, crunches aren’t evil, but they are an inefficient—and potentially risky—way to build the kind of core you actually need.
What about the plank? The plank is an anti-extension exercise. It trains your core to resist arching your lower back. This is fantastic! It’s a critical core function.
But it’s still just one piece of the puzzle. The plank is static and only operates in one plane (the sagittal plane). It doesn’t challenge your core’s ability to resist twisting or side-bending. It’s a 2D exercise, and you live in a 3D world.
Technical Breakdown: The 4 Pillars of a Functional Core
To build a truly resilient core, you must train it to perform its four main jobs. Most people only train Pillar 4 (and poorly, at that).
- Pillar 1: Anti-Extension
- The Job: To resist arching your lower back.
- The “Why”: This protects your lumbar spine from hyperextension.
- The Classic Exercise: Plank.
- The Better Exercise: Dead Bug.
- Pillar 2: Anti-Rotation
- The Job: To resist a twisting force.
- The “Why”: This is the key to transferring power in rotational sports (golf, baseball, tennis) and protecting your spine from sudden, violent twists.
- The Classic Exercise: Russian Twist (often done terribly).
- The Better Exercise: Pallof Press.
- Pillar 3: Anti-Lateral Flexion
- The Job: To resist side-bending.
- The “Why”: This keeps your pelvis and spine stable when you’re on one leg (like running) or carrying an uneven load (like groceries or a child).
- The Classic Exercise: Dumbbell Side Bend.
- The Better Exercise: Suitcase Carry.
- Pillar 4: Dynamic Stabilization & Flexion
- The Job: To dynamically control your spine and hips, including flexion.
- The “Why”: Sometimes you do need to bend or curl, but you must be able to control it and originate the movement from the right place.
- The Classic Exercise: Crunches, Sit-ups.
- The Better Exercise: Strict Hanging Knee Raise.
Now, let’s look at the 10 exercises that build a core based on these pillars.
10 Good Core Exercises to Build Real Strength
Here are 10 exercises, categorized by the core function they train.
Category 1: Anti-Extension & Stability (The “Plank Plus” Exercises)
1. The Dead Bug
This is, quite possibly, the most perfect anti-extension core exercise. It teaches you to keep your spine stable while your limbs move—the very definition of core control.
- How to Do It:
- Lie on your back with your arms pointed straight up at the ceiling and your legs in a “tabletop” position (hips and knees at 90-degree angles).
- This is the key: Press your entire lower back firmly into the floor. Imagine you have a $100 bill under your back and you can’t let anyone steal it. You should feel your low abs engage.
- Take a big breath in, then exhale and slowly lower your right arm back toward the floor behind you while simultaneously extending your left leg straight out.
- Go only as low as you can without your lower back arching off the floor.
- Slowly return to the starting position and repeat with the opposite arm and leg (left arm, right leg).
- Expert Cue: “Exhale through a straw as you lower your limbs. This will help you brace your TVA.”
- Make it Easier: Only move your legs, tapping your heels to the floor.
- Make it Harder: Hold light dumbbells in your hands and/or add ankle weights.
2. The Bird-Dog
From the mind of Dr. Stuart McGill, this exercise is part of his “Big 3” for spine health. It trains anti-extension and anti-rotation, all while strengthening the muscles that run along your spine.
- How to Do It:
- Start on all fours (a quadruped position) with your hands directly under your shoulders and knees directly under your hips. Your back should be flat.
- Brace your core, as if you’re about to be punched in the stomach.
- Slowly extend your right arm straight forward and your left leg straight backward, at the same time.
- The goal is not height. The goal is to keep your hips and shoulders perfectly level. Don’t let your hip “hike up” or your low back arch.
- Hold for a 3-5 second count, then slowly return to the start. Repeat on the other side.
- Expert Cue: “Imagine you have a glass of water balanced on your lower back. Don’t spill a single drop.”
- Make it Easier: Just extend the leg. Then, just extend the arm. Build up to doing both.
- Make it Harder: After extending, slowly draw your elbow and knee in to touch under your body, then re-extend without losing balance.
Category 2: Anti-Rotation (The “Twist-Resister” Exercises)
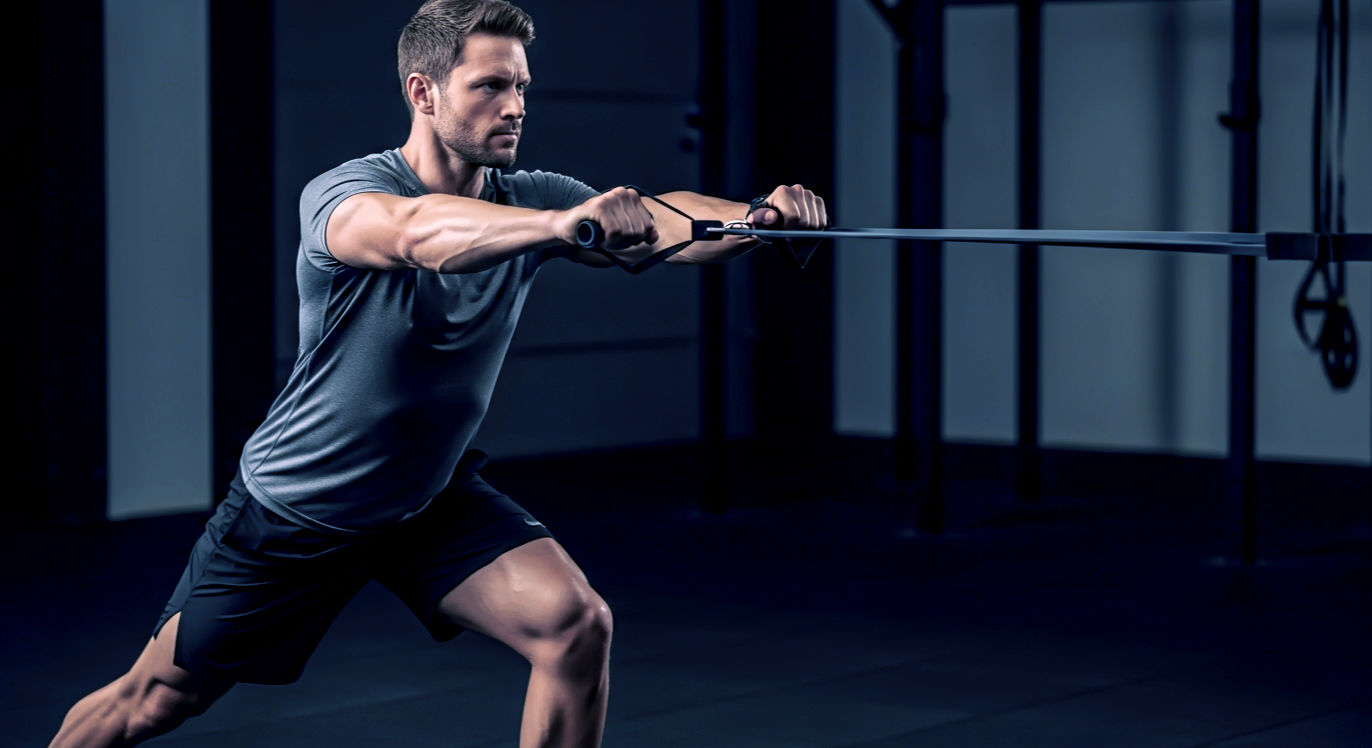
3. The Pallof Press
This is the king of anti-rotation exercises. It directly trains your obliques and TVA to do their job: stop you from getting twisted.
- How to Do It:
- Set a cable or resistance band to chest height.
- Stand sideways to the anchor point, grab the handle with both hands, and take a few steps away until there’s tension on the band.
- Bring your hands to the center of your chest. Your stance should be athletic (feet shoulder-width, knees slightly bent).
- Brace your core and press the handle straight out in front of you. The band will try to twist you back toward the anchor. Your job is to let nothing move except your arms.
- Hold for 2-3 seconds, then slowly bring your hands back to your chest. That’s one rep. Finish all reps on one side before switching.
- Expert Cue: “Squeeze your glutes and imagine your ribcage is ‘locked down’ to your pelvis. Don’t let the band ‘win’.”
- Make it Easier: Step closer to the anchor point.
- Make it Harder: Step further away or use a heavier band. You can also try this from a tall-kneeling or half-kneeling position for an extra challenge.
4. The Renegade Row
This is a plank with a purpose. It’s a brutal combination of anti-extension (holding the plank) and anti-rotation (resisting the twist as you lift a weight). It also builds a strong back.
- How to Do It:
- Start in a high plank position with your hands on two dumbbells (hex-shaped are best so they don’t roll).
- Crucial: Set your feet wider than shoulder-width. This creates a stable base.
- Brace your core and squeeze your glutes.
- Shift your weight slightly to your left hand and row the right dumbbell up toward your hip, leading with your elbow.
- The goal: Your hips and shoulders must stay perfectly square to the floor. Do not let your hips twist open.
- Place the dumbbell back down with control and repeat on the left side.
- Expert Cue: “Your belt buckle should point at the floor the entire time.”
- Make it Easier: Do this from your knees, or use no weights and just tap your opposite shoulder.
- Make it Harder: Bring your feet closer together. This gives you a smaller base of support and makes the anti-rotation challenge much harder.
Category 3: Anti-Lateral Flexion (The “Side-Bender” Exercises)
5. The Suitcase Carry
This is the most functional exercise on the list. You do this every time you carry groceries, a heavy bag, or a child on one side. It trains the quadratus lumborum (QL) (a deep back muscle that’s a common culprit in lower back pain) and your obliques.
- How to Do It:
- Pick up a heavy dumbbell or kettlebell in one hand, as if it’s a suitcase.
- Stand tall. Squeeze your glutes, pull your shoulders back and down, and brace your core.
- Your body will want to lean away from the weight. Your job is to resist this and stay perfectly upright.
- Walk forward for a set distance (e.g., 20-30 yards) or time.
- Switch hands and walk back.
- Expert Cue: “Imagine a string pulling you up from the top of your head. Stay tall. The weight is trying to pull you into a side-bend; don’t let it.”
- Make it Easier: Use a lighter weight or walk a shorter distance.
- Make it Harder: Use a heavier weight. Try a “waiter walk” (holding the weight overhead) for an extreme stability challenge.
6. The Side Plank with Hip Dip
The side plank is the plank’s often-neglected cousin. It’s a pure-play exercise for your obliques and QL. Adding a “hip dip” makes it a dynamic stability challenge.
- How to Do It:
- Lie on your side with your elbow directly beneath your shoulder.
- Stack your feet on top of each other (or stagger them, with the top foot in front, for an easier base).
- Lift your hips off the floor until your body forms a perfectly straight line from your head to your feet.
- From this position, slowly dip your bottom hip down toward the floor, then use your obliques to pull it back up to the starting position (or even slightly higher).
- Expert Cue: “Squeeze your glutes! This will push your hips forward and stop you from bending at the waist, ensuring your obliques do the work.”
- Make it Easier: Do this from your knees instead of your feet.
- Make it Harder: Raise your top leg in the air (a “Side Plank Star”).
Category 4: Dynamic & Full-Body Integration
7. The Kettlebell (or Dumbbell) Halo
This exercise trains your core to stay stable while your upper body moves through a full, 3D range of motion. It’s fantastic for shoulder mobility and thoracic (upper back) spine health.
- How to Do It:
- Stand or kneel, holding one kettlebell “by the horns” (upside down) or a single dumbbell vertically at your chest.
- Brace your core. Keep your ribcage “locked down.”
- Slowly circle the weight around your head in one direction, trying to “paint” a halo.
- Let your arms move, but do not let your ribcage flare or your torso twist. The goal is to keep your core static while your arms move.
- Complete all reps in one direction, then switch.
- Expert Cue: “Keep your chin packed. Imagine you’re moving the bell around your head, not your head around the bell.”
- Make it Easier: Do this from a tall-kneeling position, which locks your hips and makes it harder to “cheat” by arching your back.
- Make it Harder: Use a heavier weight or try a “Figure 8” variation, passing the weight through your legs.
8. The Half Turkish Get-Up (Half TGU)
The full Turkish Get-Up is a complex, beautiful movement. The Half TGU, however, is a pure core exercise that teaches you to move from lying to sitting with a stable, braced core.
- How to Do It:
- Lie on your back. Hold a kettlebell or dumbbell in your right hand, arm locked out straight above your shoulder.
- Your right knee should be bent (foot flat on the floor). Your left arm and left leg should be out at a 45-degree angle.
- Keep your eyes on the weight at all times.
- Drive through your right foot and “roll” onto your left elbow. Your chest should be proud.
- From your elbow, push up onto your left hand. You should now be in a seated position, supported by your left hand and right foot, with the weight still locked out overhead.
- Slowly reverse the motion with control back to your elbow, and then to your back.
- Expert Cue: “Don’t ‘sit up’ like a crunch. ‘Roll’ onto your elbow. It’s a diagonal movement.”
- Make it Easier: Practice with no weight (a “naked” get-up) or by balancing a shoe on your fist.
- Make it Harder: Do the full Turkish Get-Up.
9. The Bear Crawl
A primal movement that connects your upper and lower body via your core. It forces you to stabilize your spine in 3D while moving.
- How to Do It:
- Start on all fours, just like the Bird-Dog (hands under shoulders, knees under hips).
- Tuck your toes and lift your knees so they are hovering one inch off the floor. Your back should be a flat “tabletop.”
- Brace your core.
- Slowly move your right hand and left foot a few inches forward, at the same time.
- Then move your left hand and right foot a few inches forward.
- The goal is to stay low and keep your back perfectly flat.
- Expert Cue: “Pretend you have a bowl of hot soup on your back. Don’t spill a drop. Small, slow movements are better than fast, sloppy ones.”
- Make it Easier: Just hold the static “Bear Plank” (knees hovering) for time.
- Make it Harder: Crawl backward, or have a partner place a foam roller on your back (don’t let it fall off).
10. The Strict Hanging Knee Raise
This is how you functionally train the “lower” part of your rectus abdominis and hip flexors. Crunches compress the spine; this de-compresses it. But form is everything.
- How to Do It:
- Hang from a pull-up bar. Don’t be a sack of potatoes—engage your shoulders by pulling them “down and back,” away from your ears.
- This is the key: Before you lift your legs, perform a posterior pelvic tilt (imagine “tilting” your belt buckle up toward your chin). You should feel your low abs engage.
- Then, using your abs, pull your knees up toward your chest, as high as you can.
- Slowly lower your legs back down with full control. Do not just swing.
- Expert Cue: “The goal isn’t to get your knees up. The goal is to get your pelvis to roll up. Start the movement from your abs, not by swinging your legs.”
- Make it Easier: Use a Captain’s Chair (with arm supports) to take grip out of the equation.
- Make it Harder: Keep your legs straight (Straight-Leg Raise) or aim for Toes-to-Bar.
From Theory to Practice: Building Your Weekly Core Routine
Now you have the “what” and the “why.” Here’s the “how.”
Common Core Myths, Debunked
- Myth 1: You need to train your core every day.
- Fact: Your core muscles are just like any other muscle (biceps, chest, etc.). They need time to rest and recover. Training them with intensity 2-4 times per week is far more effective than doing half-hearted crunches every day.
- Myth 2: Core exercises will give you a six-pack.
- Fact: This is the most persistent myth in fitness. You cannot spot-reduce (lose fat from a specific area) fat. A six-pack is a product of low body fat, which is achieved through nutrition, total-body strength training, and cardio. Core exercises will build the abdominal muscle, but you’ll only see it if the layer of fat on top is reduced.
Case Study: Why a Runner and an Office Worker Need the Same Exercises
It’s easy to think “I’m not an athlete, I don’t need this,” but functional core strength is for everyone.
- The Runner: Every time a runner’s foot strikes the ground, their core has to manage massive forces. A weak core leads to “energy leaks.”
- The Problem: Their torso twists, or their hip drops (anti-lateral flexion failure).
- The Solution: Pallof Presses (Pillar 2) stop the torso twisting, and Side Planks (Pillar 3) prevent the hip drop, making them a more efficient and injury-proof runner.
- The Office Worker: Sits at a desk for 8 hours, often in a “slouched” position (lumbar flexion).
- The Problem: Their glutes and core “turn off,” and their lower back gets tight and sore from being overworked.
- The Solution: Dead Bugs and Bird-Dogs (Pillar 1) “wake up” the core’s anti-extension function, re-teaching it to support a neutral spine and take the load off the lower back.
Both individuals, with very different lives, need a 360-degree, stable core to protect their spine and move efficiently.
Actionable Advice: Your 10-Minute “Better Than Crunches” Workout
Stop doing endless reps. Focus on quality and tension. Pick 3-4 exercises, one from each pillar, and do them as a circuit.
The 10-Minute Functional Core Circuit (Perform 3 rounds):
- Dead Bug (Pillar 1): 60 seconds (slow and controlled)
- Pallof Press (Pillar 2): 30 seconds per side
- Suitcase Carry (Pillar 3): 30 seconds per side
- Rest: 60 seconds, then repeat.

What’s Next? The Future of Core Training is About Breath
If you’re ready for the “level 20” concept, it’s this: breathing.
The core, as we said, is a pressure canister. The “lid” of that canister is your diaphragm—your primary breathing muscle. The “base” is your pelvic floor.
A truly strong brace, known as Intra-Abdominal Pressure (IAP), is created when you take a big “360-degree” breath into your core (expanding your front, sides, and back) and then “lock it down.” This is what a powerlifter is doing before a massive squat. They’re creating a natural “air cast” to protect their spine.
The future of core training is integrating this diaphragmatic breathing with movement, learning to brace on demand to create a truly immovable, stable center.
Conclusion: Your Core Is Your Center
Your core is the foundation for all movement. It’s the vital link that transfers power from your legs to your arms. It’s the shield that protects your spine.
By ditching the high-rep, low-value crunches and embracing 3D, functional movements, you’re not just training your “abs.” You’re building a stronger, more resilient, and more useful body.
Pick 3 of these exercises. Try the 10-minute workout this week. Feel the difference between bracing and crunching. Your back will thank you.
Further Reading:
- Seminal academic papers on spinal biomechanics by Dr. Stuart McGill.
- Reports from the National Strength and Conditioning Association (NSCA) on core training.
- The “Back Mechanic” book for in-depth spine health.
- Peer-reviewed studies on core muscle (EMG) activation.
- Position stands from the American Council on Exercise (ACE) on functional training.